With this command you can create a seal with just a few mouse clicks. This can be shown optionally with back-filler.
Input request
This input request only appears when the option Determine on screen has been activated in the Dialog box Seal.
Option Object
[Object Mode]
Select first joint edge of object or [Point/Settings/?] <Point>:
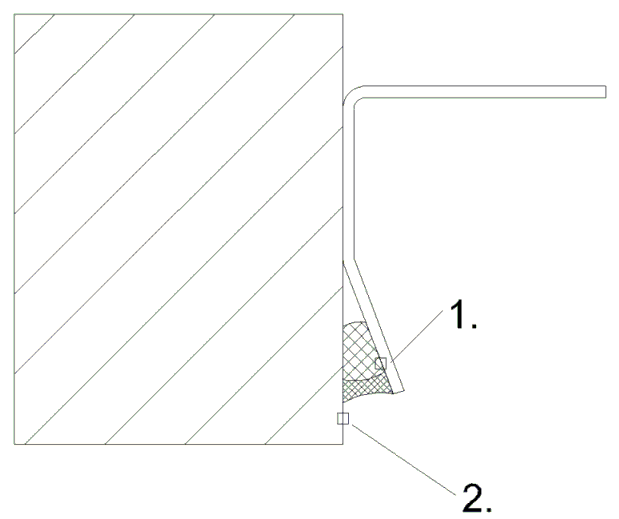
Select an object to define the first joint edge. In this respect take into account that the side of the seal depends on the selected side of the object.
Use the Option Point to create the seal by specifying points.
Use the Option Settings to adapt the properties of the seal.
With the option ? you call the help.
Select second joint edge of object or [Point/Settings/Undo/?] <Point>:
Select an object to define the second joint edge.
Use the option Undo to repeat the previous input request.
ath_silikon_objektmodus
Seal object mode
Option Point
[Point Mode]
Specify first joint point or [Object/Settings/?] <Object>:
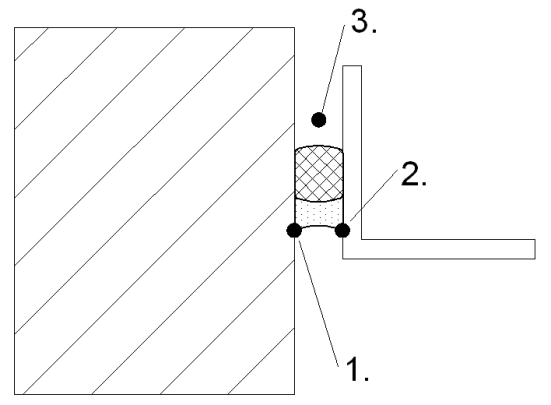
Specify the first joint point.
Use the Option Object to create the seal by object selection.
Use the Option Settings to adapt the properties of the seal.
With the option ? you call the help.
Specify second joint point or [Object/Settings/Undo/?]:
Specify the second joint point.
Use the option Undo to repeat the previous input request.
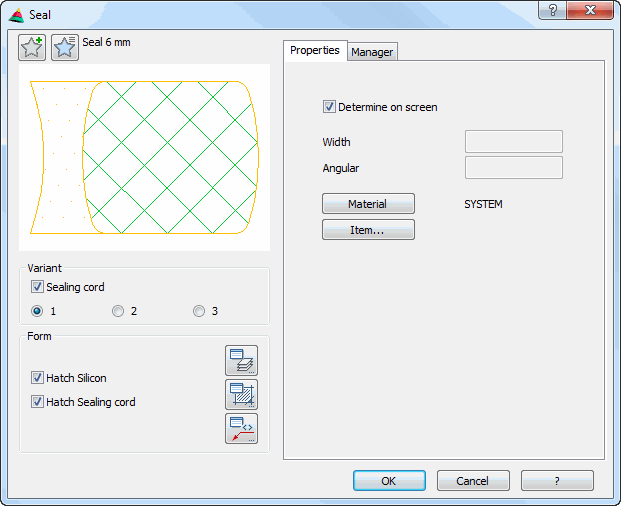
In the dialog box you will find on the left side the display section with the dynamic preview. On the right side you can see the operating section with the tabs Properties and Manager. The properties are object specific; the manager is the same for all objects.
db_ath_silikon
Display section
At the top left there are two buttons for favorites. You will find further information on this in the section Saving and using favorites.
The preview is primarily intended for visual checks and shows the seal with the set properties.
Dialog box section Variant
Sealing cord Defines whether the seal is to be back-filled with or without sealing cord.
Variant 1 Activates the variant of thin seal and thick sealing cord.
Variant 2 Activates the variant of thick seal and thin sealing cord.
Variant 3 Activates the variant of thick seal and thick sealing cord.
With subsequent changes to the variants of seals, in each case only the thickness of the seal is changed. The thickness of the sealing cord remains as it was produced.
Dialog box section Display
Hatch silicone Hatches the silicone part of the seal.
Hatch sealing cord Hatches the sealing cord of the seal.