Extrudes 2D outlines (circles or polylines) and creates a 3D solid. This is primarily used as a process on a bar. Extrusions can be modified with grips and can be saved as library objects.
When you execute the command, the following appears:
Input request
Extrusion [Objects/Fetch/?] <Objects>:
Choose the option Objects to extrude outlines.
Choose the option Fetch to use an existing extrusion.
Select objects:
Select the outlines which you want to extrude. You can select many outlines (an outer outline and optionally a number of inner outlines).
State the height of the extrusion or [Taper angle/Material/?]:
Determine the height of the extrusion.
Option Taper angle
Specify taper angle or [?] <0>:
Determine the taper angle of the extrusion. Press the Enter key to accept the default angle of 0°.
After specifying the taper angle, the selected outlines are extruded.
Extrusions can be used immediately without saving them, for example as a process (notch) on a bar.
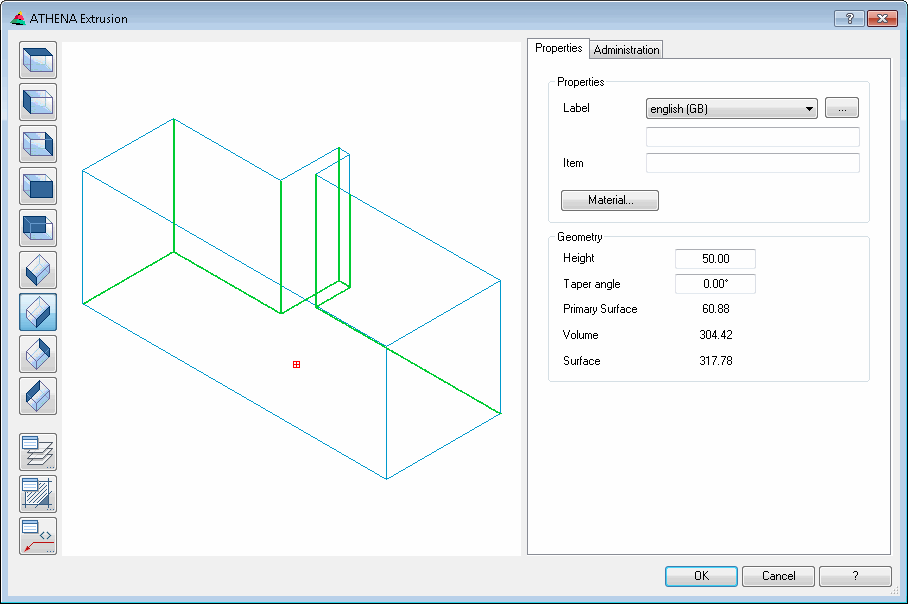
You can save an extrusion or modify its properties. For this, double click the extrusion and go through the required options in the Dialog box ATHENA Extrusion.
Dialog box ATHENA Extrusion
db_ath_extr
On the left side the dialog box includes a preview of the extrusion as well as various control elements and display options for modifying the preview. You will find further information in the sections Object views and Display options.
On the right side of the dialog box there is the operating section with the tabs:
Labeling Defines the extrusion label. You can save the label in various languages. To do this, choose the required language from the list.
[...] Opens the Dialog box Label, where you can conveniently edit the designations for various languages. You will find further information in the Chapter Label.