At the top left there are two buttons for favorites. You will find further information on this in the section Saving and using favorites.
The preview displays the current drilled hole. The preview is primarily used for a visual check, but offers other functions too:
Additional functions are activated by clicking in the preview with the mouse wheel. You will find further information on this in the section Object preview.
To the left of the preview there are buttons with which you can adjust both the preview and also the insertion into the drawing. You will find further information on this in the section Object views.
Label button Opens the Dialog box Label. You will find further information on this in the Chapter Labeling.
Operating section
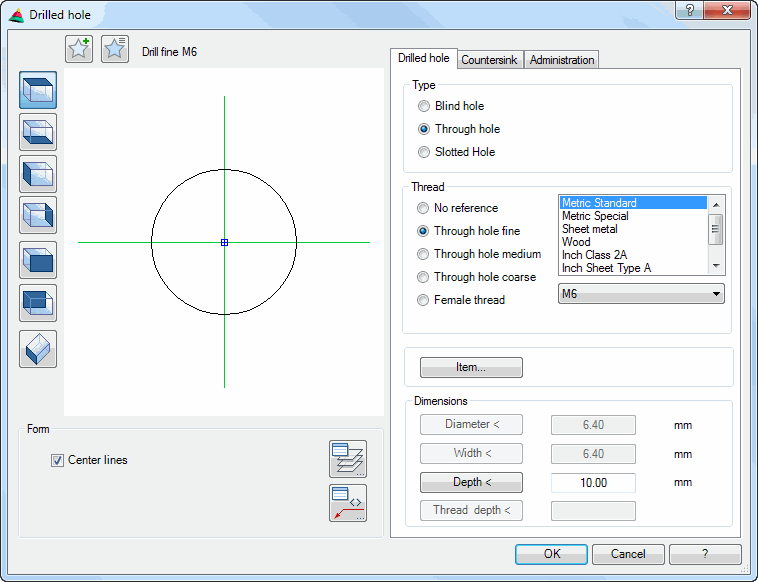
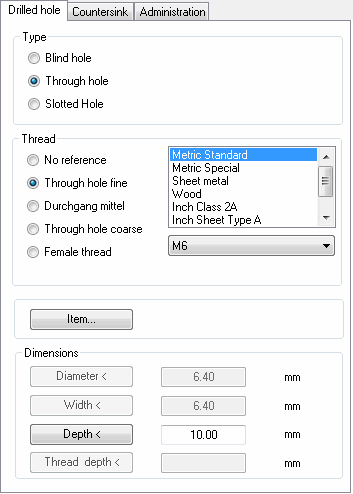
Tab Drilled hole
db_ath_drill_bohrung
Dialog box section Type
Blind hole Creates a blind hole.
Through hole Creates a through hole.
Slotted hole Creates a slotted hole.
Dialog box section Thread
No reference Creates a drilled hole without any reference. The dimensions can be freely defined.
Through hole fine Creates a through hole in the fine tolerance class.
Through hole medium Creates a through hole in the medium tolerance class.
Through hole coarse Creates a through hole in the coarse tolerance class.
Note on tolerance classes: For metric threads the hole diameter is defined to tolerance classes according to DIN EN 20273. With other types of thread the diameter is subject to 10%, 20% or 30% depending on the tolerance class.
Female thread Creates a threaded hole.
List of threads Defines the type of thread. The following are available:
• Metric standard
• Metric special
• Sheet metal
• Wood
• Inch Class 2A
• Inch sheet metal Type A
• Inch sheet metal Type AB
• Inch wood
Pick list Diameter Defines the thread diameter. This depends on the selected thread.
Dialog box section Dimensions
Diameter Defines the diameter of the hole. With this tick box the dialog box Drilled hole is temporarily closed and you can define the diameter by choosing two points.
Width Defines the width of the slotted hole. With this tick box the dialog box Drilled hole is temporarily closed and you can define the width by choosing two points.
Depth Defines the depth of the hole. With this tick box the dialog box Drilled hole is temporarily closed and you can define the depth by choosing two points.
Thread depth Defines the thread depth of the hole. With this tick box the dialog box Drilled hole is temporarily closed and you can define the thread depth by choosing two points.
Dialog box section Item
Item Opens the Dialog box Item, where you can specify an item number (or process number) for the hole. You will find a detailed explanation on items in the Chapter Item.
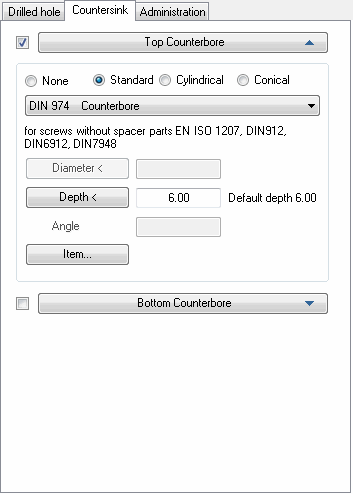
Tab Countersink
db_ath_drill_senkung
None Creates a drilled hole without any counterbore.
Standard Creates a drilled hole with standard counterbore. Choose the required standard from the list.
Cylindrical Creates a cylindrical counterbore. The diameter and counterbore depth can be freely defined.
Conical Creates a conical counterbore. The angle and counterbore depth can be freely defined.
Diameter Defines the diameter for cylindrical counterbores. With this tick box the dialog box Drilled hole is temporarily closed and you can define the diameter by choosing two points.
Angle Defines the angle for conical counterbores.
Depth Defines the depth of the counterbore. With standard counterbores the default depth is suggested. With this tick box the dialog box Drilled hole is temporarily closed and you can define the depth by choosing two points.
Item Opens the Dialog box Item, where you can specify an item number (or process number) for the counterbore. You will find a detailed explanation on items in the Chapter Item.
Tab Manager
You will find a detailed description of the functions of the manager in the Chapter Management of objects.
End of program
OK saves the settings made. The dialog box is terminated and then follows:
Input request
Specify insertion point:
Use the mouse or enter co-ordinates to specify the insertion point of the hole.
Specify rotated angle<0>:
Use the mouse or enter an angle to specify the rotation angle.
Press the Enter key to accept the default angle.
Cancel terminates the dialog box without saving the settings.
ath_drill
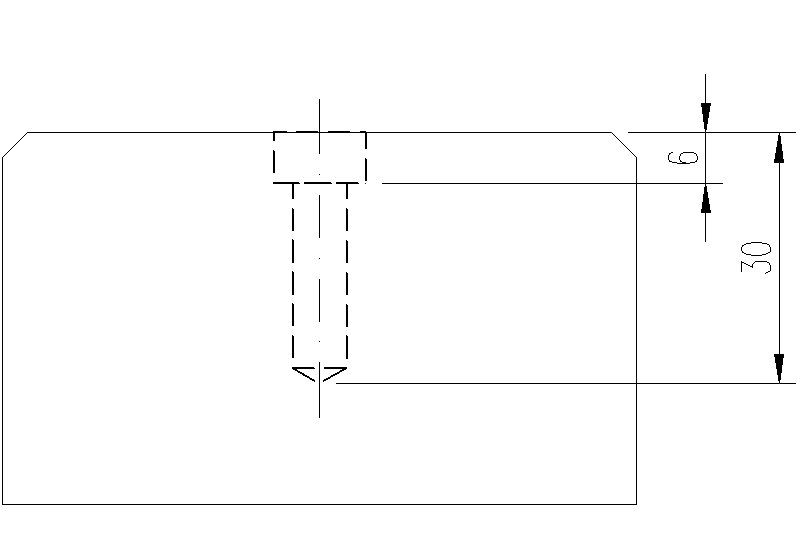
Blind hole with counterbore
Note
• Drilled holes can be retrospectively labeled with the command Parts labeling.
• You can change the hole properties with the command Modify object or by a double click.
• With the command Object to solid body you can convert the drilled holes to solids.
• With the command Projection objects you can generate 2D projections of drilled holes.