With this command you can create a spacer with just a few mouse clicks. You can use the spacer with or without material specification (e.g. as plastic shim).
The block is also used as an edge composite for fillings.
Depending on the last usage, either a command prompt or the following dialog box will appear:
Dialog box Spacer properties
In the dialog box you will find on the left side the display section with the preview. On the right side you will see the operating section. You can activate the individual function areas with register buttons.
db_ath_spacer
Display section
At the top left there are two buttons for favorites. You will find further information on this in the section Saving and using favorites.
The preview shows the spacer with the currently set properties. The preview is primarily used for a visual check, but offers other functions too:
Additional functions are activated by clicking in the preview with the mouse wheel. You will find further information on this in the section Object preview.
To the left of the preview there are buttons with which you can adjust both the preview and also the insertion into the drawing. You will find further information on this in the section Object views.
Notefor insertion into the various views:
• When you insert a spacer as side elevation from the left or right, either the dimensions or the base point and the rotation angle are interrogated. For further information siehe "Input request for blocks as cross sections".
• If you insert a semi-finished product as 2D plan view, 2D bottom view, 2D front elevation or 2D rear elevation, the length is interrogated on insertion. For further information siehe "Input request for block projections".
• The solid is a "known" bar assembly, the name of which consists of the TMP and an incremented number. You will find further information on bar assemblies in the sections Bar assembly manager and Apply bar assembly.
Dialog box section Display
Outline Creates a spacer without infill.
Standard Creates a standard spacer which is filled with an X.
Hatched Creates a spacer with hatched infill. When you select a material, the material-dependent hatching is used.
Determine on screen Determines the dimensions of the spacer on the screen when you close the dialog box with OK. Further input requests follow.
The option Determine on screen is saved permanently.
If this option has been activated, the input fields Width and Height are deactivated. Otherwise you can specify the dimensions in these input fields.
Width Defines the width of the spacer.
Height Defines the height of the spacer.
Chamfer Creates a spacer with chamfers. Once you have activated the main tick box for the chamfers, four further tick boxes are enabled with which you can define which corners of the spacer are to be chamfered. In the input field you define the chamfer spacing.
Item Opens the Dialog box Item, where you can select an item number. You will find a detailed explanation on items in the Chapter Item.
Tab Manager
You will find a detailed description of the functions of the manager in the Chapter Management of objects.
Input request for blocks as cross sections
This input request appears when the option Determine on screen has been activated in the Dialog box Spacer properties.
Option Point
[Point Mode]
Specify base point or [Settings/Object/?]: <Object>:
Use the mouse or enter coordinates to specify the base point.
Use the Option Settings to change the properties of the spacer.
Use the Option Object to create the spacer by object selection.
With the option ? you call the help.
[Point Mode]
Specify second point or [Width/Thickness/Settings/Undo/?]:
Define the second point of the spacer. With the second point you define the width and direction of the spacer.
Use the Option Width to specify the width of the spacer. A further input request follows.
Use the Option Thickness to specify the thickness of the spacer. A further input request follows.
Use the option Undo to repeat the previous input request.
[Point Mode] Width=XX
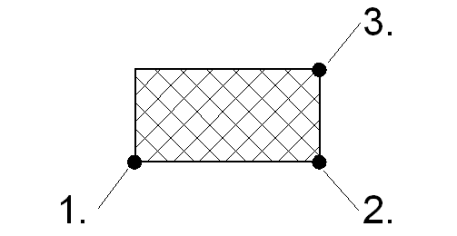
Specify third point or [Width/Thickness/Settings/Undo/?]:
Define the third point of the spacer. With the third point you define the thickness and side of the spacer.
ath_klotz
Spacer point mode
Option Object
[Object Mode]
Select edge or [Settings/Point/?] <Point>:
Select an object edge to define the width and direction of the spacer.
Use the Option Point to create a spacer by specifying points.
[Object Mode] Width=XX
Specify third point or [Width/Thickness/Settings/Undo/?]:
Specify the third point of the spacer or select an option. With the third point you define the thickness and side of the spacer.
Option Width
[Width Mode]
Specify width or [Point/Thickness/Undo/Settings/?]:
Enter the width of the spacer or select an option. You can point out the width with the mouse or enter it in the command line.
Option Thickness
[Thickness Mode]
Specify thickness or [Point/Width/Undo/Settings/?]:
Enter the thickness of the spacer or select an option. You can point out the thickness or enter it in the command line.
This input request appears when the option Determine on screen has been deactivated in the Dialog box Spacer properties.
Specify insertion point or [?]:
Define the insertion point of the spacer.
With the option ? you call the help.
You can change between different insertion points by repeatedly pressing the Shift+Ctrl keys.
The corner points of the enclosing rectangle may be used as insertion points. The insertion point activated by Shift+Ctrl only applies for the duration of the insertion.
In the menu ATHENA>Drawing>Spacer variants you will find examples of spacers with various materials set as default. These have the advantage that you do not need to activate the dialog box for frequently used materials.
Similarly as with the spacer, you can also predefine materials for Gasket and Seal. In this way you can also insert these objects into the drawing quickly and easily.
In order to define your own spacer variants (or gasket or silicone variants) it is best to create a new command in your user adaptation file (e.g. ath_user.cui). The command macro would then be similar to this: ^C^C^PATH_OBJ_MAT_SET KLOTZ WOOD ATH_KLOTZ; This macro activates the material wood and then starts the command Spacer, which is then created with the appropriate material settings (hatch and layer). In the command macro KLOTZ stands for the function. Similarly, you have to use DICHT for gaskets and SILIKON for seals. WOOD stands for the material name. You can view this in the ATHENA options in the sub-dialog box Material properties. You will find further information about user adaptation in the AutoCAD documentation.