The dialog box Apply Infill appears when you insert an infill into the drawing (refer to command Apply infill) or when you modify existing infills, for example with a double click.
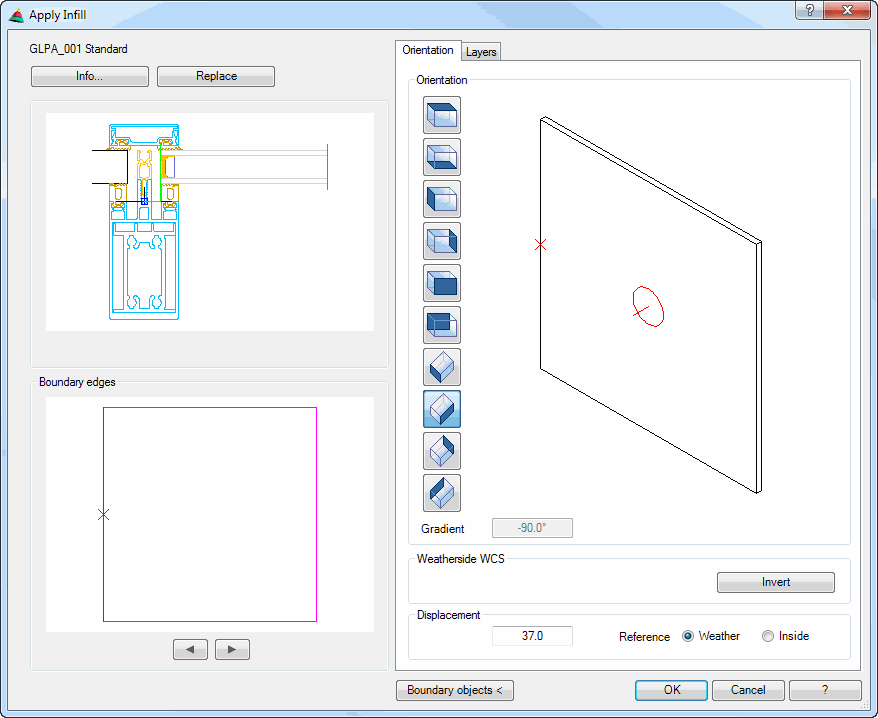
Dialog box Apply infill
The display section is located on the left side of the dialog box. On the right side there is the operating section with the tabs Orientation and Layers.
db_ath_st3d_panel_edit
Display section
Info Displays the layer structure of the current infill. To do this, the Dialog box Infill is displayed.
Replace Replaces the existing infill. You can select the new infill in the Dialog box Apply infill.
The preview picture shows the cross section of the infill at the current boundary edge. Here, the clamping is shown if one is present.
Dialog box section Boundary edges
Shows the boundary edges of the infill. The current boundary edge is shown in red and marked with an X. To change the boundary edge, you can click on it directly in the preview.
[<] Marks the next edge in the counterclockwise direction.
[>] Marks the next edge in the clockwise direction.
Operating section
Tab Orientation
The preview shows the infill in its position in the World Coordinate System. Additional functions are activated by clicking in the preview with the mouse wheel. You will find further information on this in the section Object preview.
To the left of the preview there are buttons with which you can adjust the preview. You will also find further information on this in the section Object views.
The infill gradient is displayed in degrees (°) below the preview.
Weather side WCS
Invert Changes the weather side. The effects are apparent from the symbols.
Displacement
Specifies the distance of the reference side of the infill to the insertion point of the boundary object (e.g. bars). With the option buttons Weather and Inside you define the reference side of the infill.
Tab Layers
Here, all layers of the infill are shown from the weather side (above) to the inside (below). Click a layer to mark it.
Dialog box section Overlap
Defines a value for the overlap in order to create stepped-edge glazing. The overlap initially only applies to the marked layer of the active side (marked red in the preview).
All layers same Adopts the specified overlap for all layers of the infill.
All boundary edges same Adopts the specified overlap for all boundary edges which surround the infill.
Dialog box section Inset
Specifies the inset from the outermost edge of the boundary object (enclosing rectangle) to the infill.
All boundary edges same Adopts the entered inset for all boundary edges which surround the infill.
Dialog box section Edge spacer
Activates the edge spacer. Here, you can define a different edge spacer for each side.
Select insulating glass in the pick box to use a predefined edge spacer for insulating glass. Click [...] to choose an insulating glass edge spacer in the Dialog box Edge spacer. Select Spacer to use a rectangular edge spacer. Click [...] to adapt the spacer properties. You will find further information in the Chapter Spacer. Choose Profile to use a freely defined profile as the edge spacer. The profile definition occurs in the Dialog box Bar assembly manager. You will find further information in the Chapter Bar assembly manager.
Dialog box section Fold
Activates folds for sheet metal layers. Here, you can define a different fold for each side. When you activate the tick box, the Dialog box For object selection is opened, where you can select a fold sequence.
Elevation side Inverts the elevation side of the metal sheet. This function is not available when a sheet with folds is used in an external view (weather side or inside).
This section is active with profiled panels. You can change the slope and the receptacle depth on each side.
Receptacle depth Defines the distance from the sheet edge to the first fold.
Slope Defines the gradient of the receptacle.
Boundary objects < Assigns new boundary objects to the current infill. Then a query appears. If you respond to this confirmation query with No, then the boundary objects will not be changed. The following input request appears if you select Yes.
Input request
Select boundary object or [?]:
Use the mouse to choose the first boundary object.
Select boundary object or [Undo/?]:
Use the mouse to choose the next boundary object. This input request is repeated. After selecting the last boundary object, press the Enter key to assign the new boundary objects. The Apply infill dialog box appears once again.
End of program
Click OK to quit the dialog box and to accept the changes. With Cancel, the changes are discarded.