With this routine you create levels with automatic computation in the horizontal direction. The display of the levels with computation can be made to the left (default) or to the right.
You can also use vertical levels in conjunction with interrupted dimensions. The interruption definitions are taken fully into account.
ath_hoho
Horizontal levels
Input request
Select level or dimension of definition or [New/?] <New>:
Click an existing level or dimension with the mouse to supplement an existing definition.
Use the Option Settings to change the level settings in a dialog box.
Specify the vertical position of the level or [?]:
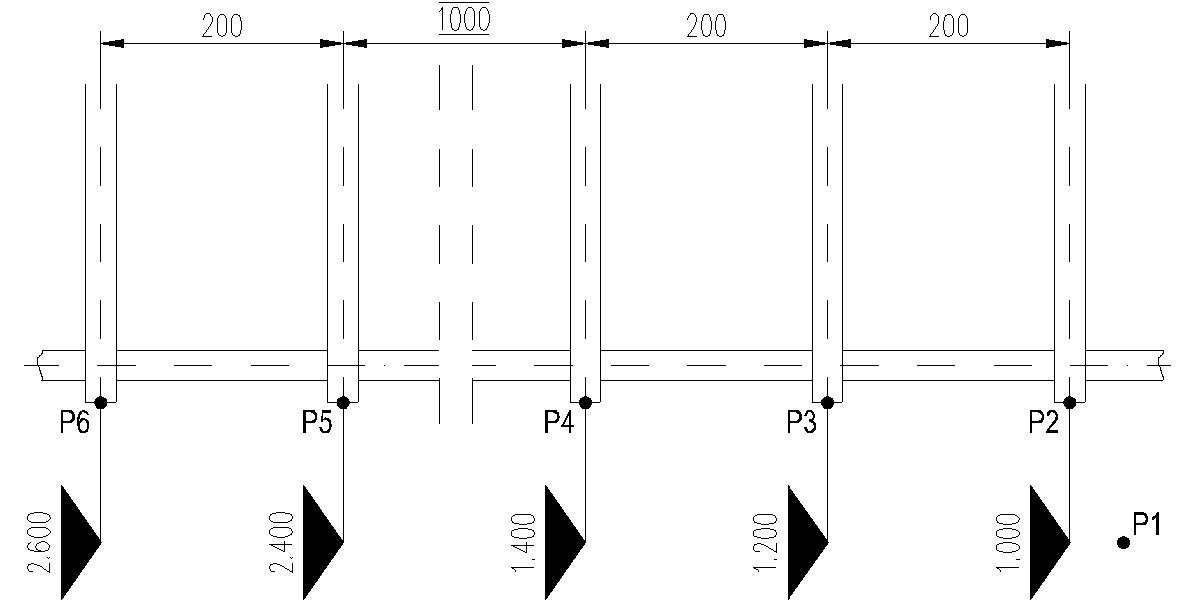
Specify a point by clicking with the mouse or entering the co-ordinates to define the vertical position of the levels; see illustration Horizontal levels P1.
Enter the height of the first point (mm) or [?] <0>:
Enter the height for the selected point. This value forms the basis of computation for the other levels; see illustration Horizontal levels 1000.
Current setting: Decimal places: 0, Scale: 1
Specify next point or [Settings/?]:
Specify the next point from which a level is to be created (e.g. P3) or select an option. The input request is repeated until you enter ENTER to terminate the command.
Option Settings
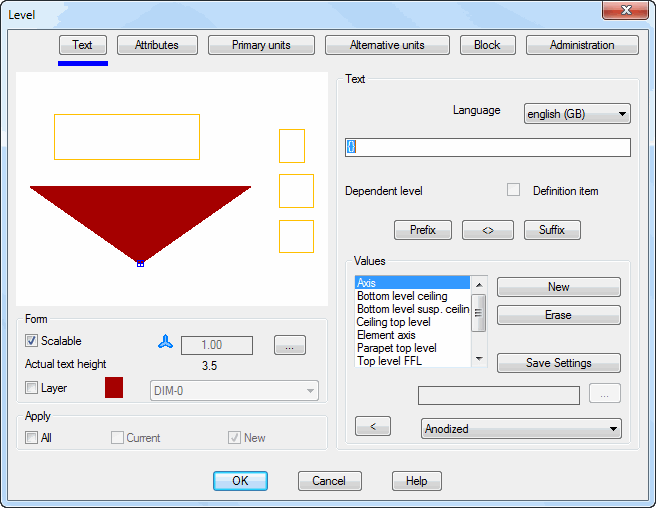
Dialog box Level
In the dialog box you will find on the left side the display section with the preview. On the right side you will see the operating section. You can activate the individual function areas with register buttons.
db_ath_hkote
Display section
The display section shows a schematic preview of the current level.
Below the preview you will find options for changing the display. You will find further information on this in the section Display options for labels.
Dialog box section Apply
The tick boxes in this region only affect the display settings (layer and scaling). All other settings have an effect on all levels in the dimension system.
All Transfers the changes on editing a level to all levels of the dimension system.
Current Is always switched on and changes only the selected level.
New Changes both the current (Current tick box is always active) and the new levels of the dimension system.
Operating section
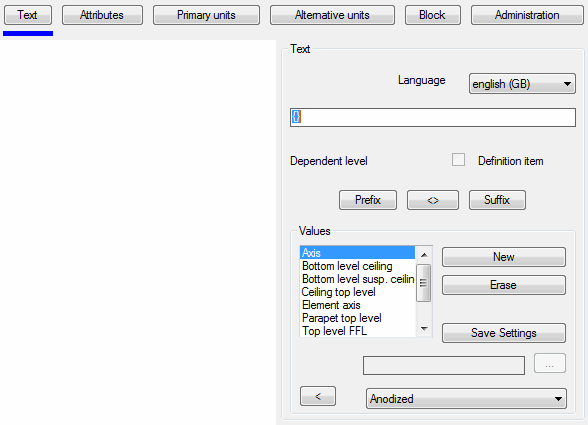
Register button Text
db_ath_hkote_text
Dialog box section Text
Language Defines the language for the optional additional texts (prefix/suffix).
Input line Shows the dimension text of the current object. You can supplement dimension texts directly in the input line or use the methods described further below.
Below the input line the object type is displayed, e.g. level dependent (calculated level).
Definition dimension Converts a dependent level into a definition level. The previous definition level is converted in this way into a dependent level.
Prefix Positions the text selected in the value list before the current dimension text.
[<>] Restores the original dimension text.
Suffix Positions the text selected in the value list behind the current dimension text.
Dialog box section Values
Value list Shows the texts available for the selected object. Here, select the text for further use. If you select a text, it is displayed in the input line. Here, you can modify the text and adopt it by pressing the Enter key.
New Enables the input line for the definition of a new text. You write a text in the input line and press the Enter key to insert the text into the list.
Remove Removes the selected text from the list.
Save List Saves the texts of the value list. If you do not save the list, the texts are only available for the duration of the drawing session.
Input line Defines new texts or displays the text selected in the value list.
[...] Opens the Dialog box Label, where you can conveniently edit the designations for various languages. You will find further information in the Chapter Label.
If you edit texts in the Designation dialog box, you must then save them with the Change button.
[<] and pick list The pick list displays multilingual standard texts from the text database ath_user.rsx.Select a text and click the button [<] to insert the text into the list. You will find further information about labeling objects in the chapter Multilingual standard texts.
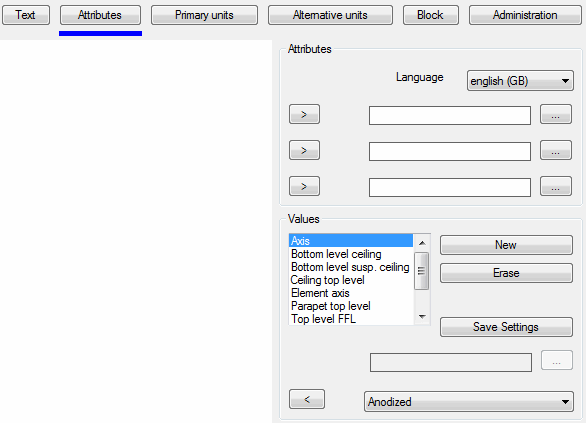
Register button Attributes
db_ath_hkote_attribute
Dialog box section Attributes
Language Defines the language for the optional additional texts for attributes.
In the three input lines you can directly define the additional texts for the relevant attribute field.
> Transfers the text marked in the value list to the appropriate attribute line.
[...] Opens the Dialog box Label, where you can conveniently edit the designations for various languages. You will find further information in the Chapter Label.
Dialog box section Values
Value list Shows the dimension texts available for the selected object. Here, select the text for further use.
New Supplements the text from the input line in the list.
Modify Changes the selected text.
Remove Removes the selected text from the list.
Save List Saves the texts of the value list. If you do not save the list, the texts are only available for the duration of the drawing session.
Input line Defines new texts or displays the text selected in the value list.
[...] Opens the Dialog box Label, where you can conveniently edit the designations for various languages. You will find further information in the Chapter Label.
If you edit texts in the Designation dialog box, you must then save them with the Change button.
Register button Primary units
db_ath_hkote_primaereinheit
Dialog box section Primary units
Displays the units set in the drawing.
You can change the units of the drawing with the AutoCAD command Units (_units).
Precision Defines the accuracy (number of decimal places) for primary units.
Rounding Determines the rounding rules for the primary units. If you enter the value 0.25 here, all distances are rounded to the nearest quarter level. If you enter the value 1.0, all distances are rounded to the nearest integer number. The number of figures after the decimal separator depends on the Precision setting.
Decimal separator Defines the decimal separator.
Dialog box section Suppress zero
Pre-decimal point Suppresses leading zeros in decimal dimensions. For example, 0.500 becomes .500.
Post-decimal point Suppresses following zeros in decimal dimensions. For example, 0.500 becomes 0.5.
0 foot Suppresses stating feet for dimensions in feet and inches when the distance is shorter than one foot. For example, 0'-6 1/2" becomes 6 1/2".
0 inch Suppresses stating inches for dimensions in feet and inches when the distance is an integer in feet. For example, 1'-0" becomes 1'.
Dialog box section Dimension scale
Scale factor Defines the scale factor of the height dimension.
It is recommended that the default of 1.0 is not changed. For example, if you enter the value 2.0, the height dimensions of the dependent levels are doubled.
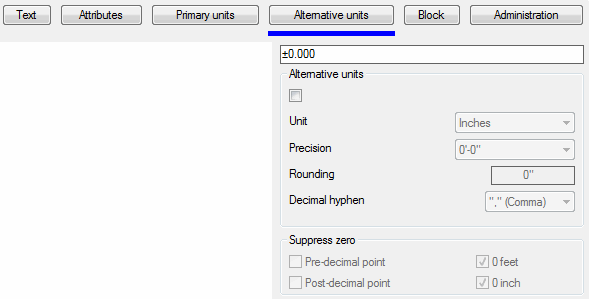
Register button Alternative units
db_ath_hkote_alternativeinheit
Switches on alternative units.
If you have set decimal units, units with inches are used as alternative units. If you have set units with inches, decimal alternative units are used.
Precision Defines the accuracy (number of decimal places) for alternative units.
Rounding Determines the rounding rules for the alternative units. If you enter the value 0.25 here, all distances are rounded to the nearest quarter level. If you enter the value 1.0, all distances are rounded to the nearest integer number. The number of figures after the decimal separator depends on the Precision setting.
Decimal separator Defines the decimal separator.
Dialog box section Suppress zero
Pre-decimal point Suppresses leading zeros in decimal dimensions. For example, 0.500 becomes .500.
Post-decimal point Suppresses following zeros in decimal dimensions. For example, 0.500 becomes 0.5.
0 foot Suppresses stating feet for dimensions in feet and inches when the distance is shorter than one foot. For example, 0'-6 1/2" becomes 6 1/2".
0 inch Suppresses stating inches for dimensions in feet and inches when the distance is an integer in feet. For example, 1'-0" becomes 1'.
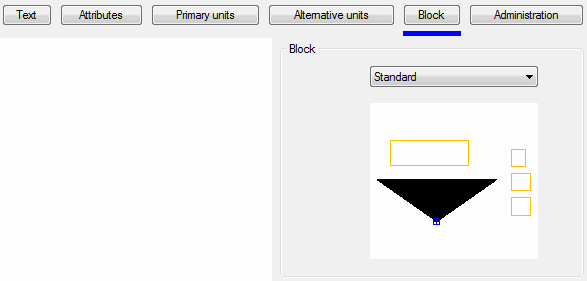
Register button Block
db_ath_hkote_block
Dialog box section Block
Defines the block of level. If you select a block from the list, it is displayed as a preview.
Register button Manager
You will find a detailed description of the functions of the manager in the Chapter Management of objects.
The display properties (e.g. the text height) depend on the scale and cannot be saved as default values.
Block assignments also cannot be saved as default. To change the standard level you have to adapt the file ath_level.dwg.
Integrating your own blocks for levels:
If you would like to integrate your own blocks, you must observe the following naming conventions:
A drawing is needed for each level. Attributes for the height (attribute name = HKOTE) and three supplementary texts (attribute names = T1, T2 and T3) must be present. The drawings must be saved in the folder ATHENA\DataLocal under the following names.
• Modifying levels: You can change dimension texts of levels with the command Modify object or by a double click. To do this, the Dialog box Dimension text is started.You will find the functional description in the chapter Change dimension text.
• When you stretch, move, copy or mirror levels, the levels are automatically updated (recalculated).
• If you mirror the definition levels such that the arrow tips point in the opposite direction, the computation direction of the levels is changed and the levels are automatically updated (recalculated).
• The definition level is underlined in order to identify it as such.
• If you delete the definition level, the next created level automatically becomes the new definition level.
• The display size of the level depends on the current size of the dimension figure.
• In the 3D section the levels are projected into the current UCS.
• The level auxiliary line (line from the level to the defined point) is suppressed when the distance between the defined point and the level insertion point is less than the value of the system variable dimexo (distance from the dimension auxiliary line to the edge of the solid).
• If you have many level definitions in the drawing, you can show the levels which belong to a group with the command Highlight associated dimension objects.