Job-related management of frame elements (facade elements as well as window and door elements).
All frame elements of the drawing are shown in a dialog box. You can insert them into the drawing as a production drawing or as a CAD position. Furthermore, you can change the project settings here and carry out analyses of the frame elements.
Dialog box Frame elements
db_ath_elevation
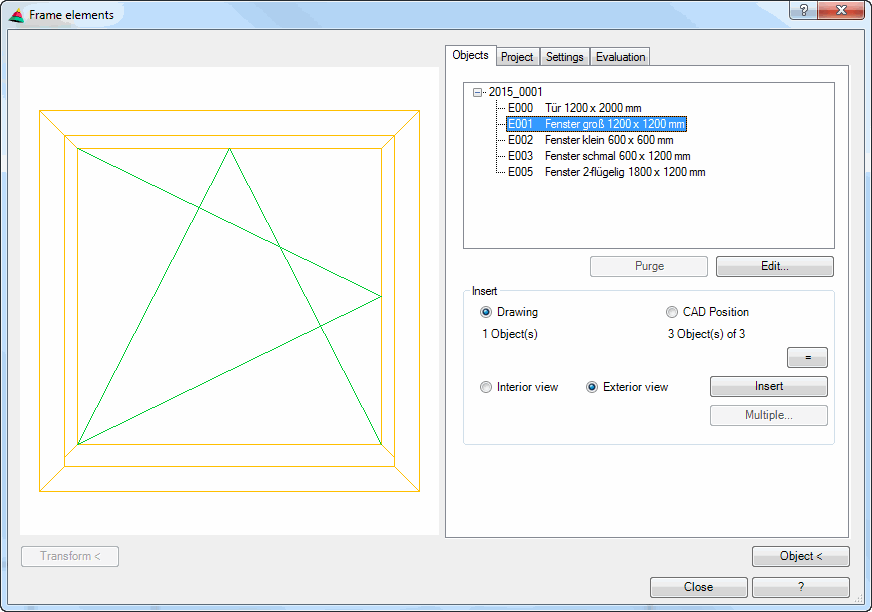
In the dialog box you will find on the left side the display section with the dynamic preview.
On the right side of the dialog box there is the operating section with the following tabs:
The preview is used as a visual check. You will find further information on this in the section Object preview.
Convert < Converts a frame element from an earlier ATHENA version to the current version. Also frame elements which have been created with the setting ATH_ELEVATIONTYPE=1 must be converted to be able to use them with this function.
Operating section
Tab Objects
db_ath_elevation_objekte
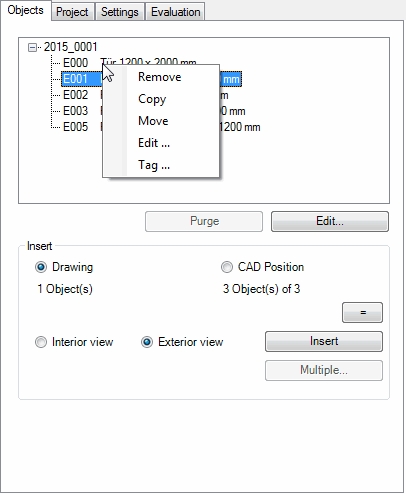
The list shows the jobs as well as the frame elements that they contain. Here, you can mark a frame element to edit it or to insert it into the drawing. When you click a frame element with the right mouse key, a context menu appears with further functions:
Remove Removes the marked frame element from the list and deletes all insertions from the drawing.
Copy Creates a copy of the marked frame element. The copy has the same properties as the source object, but may be assigned to a different job. To do this, the Dialog box Projects is displayed.
Displace Moves the marked frame element to another job.
Edit ... Irrespective of the type of frame element, this starts a dialog box for editing the frame element.
Tag ... Modifies the tag of the selected frame element. To do this, the Dialog box Tag is displayed.
Purge Removes unreferenced frame elements from the list. The button is inactive when no unreferenced objects are present.
Production drawing Inserts the selected element as a production drawing. The production drawing can be automatically dimensioned and labeled.
CAD Position Inserts the selected element as a CAD position. As standard CAD positions are inserted as solids. With the command Display modes the frame elements can be converted to 2D projections.
[=] Sets the quantity of the marked frame element equal to the quantity of the inserted CAD positions.
If you have specified seven pieces for a window element, but only six CAD positions have been inserted, a note is displayed in the dialog box. By using the equals sign the specified quantity is reduced by one and changed to six. The note then disappears.
Interior view This inserts a production drawing of the marked frame element into the drawing as an interior view when you click on the Insert button.
Outer elevation This inserts a production drawing of the marked frame element into the drawing as an exterior view when you click on the Insert button.
Insert Inserts the set element into the drawing. For this, the dialog box is closed and the following appears:
Input request
Specify insertion point or [?]:
Use the mouse or enter co-ordinates to specify the insertion point of the frame element.
With the option ? you call the help.
Multiple Inserts several frame elements into the drawing simultaneously as production drawings. In addition the Dialog box Insert is displayed, where you can define the arrangement of the production drawings.
Only the production drawings are inserted for which no insertion in the drawing is already present.
The dialog box is closed after the insertion of the frame elements. If necessary, the command must be repeated to carry out further actions.
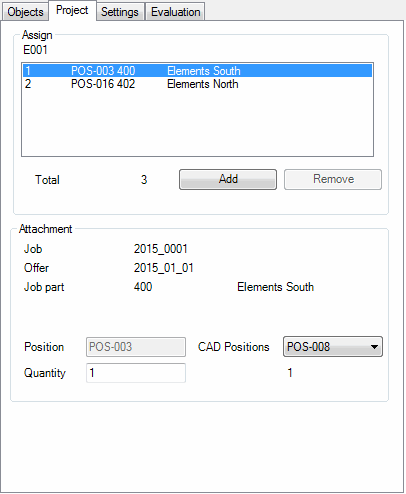
Tab Project
db_ath_elevation_projekt
Dialog box section Assignment
The list shows frame elements of a job with identical tag.
Example: You have five identical windows (tag = E001). One of them is assigned to the job part 400 (Elements South) and two of them are assigned to the job part 402 (Elements North).
The tag (E001) is displayed via the list.
The list shows the frame elements with this tag according to the following format: Quantity, Position No., Tag, Job Part, Assignment.
The total quantity of the frame elements for the job is displayed below the list.
Add Inserts a new identical frame element into another job part. For this, the Dialog box Projects is displayed, where you can select another job part.
Remove Removes the selected frame element from the list. The total number of identical frame elements is reduced corresponding to the removed objects.
Job, Offer, Job part Here, once again the job data of the selected frame element are displayed.
Position Defines the first position number for the frame element.
CAD Position Shows the position numbers of the inserted CAD positions.
Relationship between Position - CAD Position:
The position is a fictitious position number which you can issue freely (double numbers are not allowed and are automatically corrected).
The CAD positions are automatically incremented starting from the position.
Quantity Defines the quantity of frame elements.
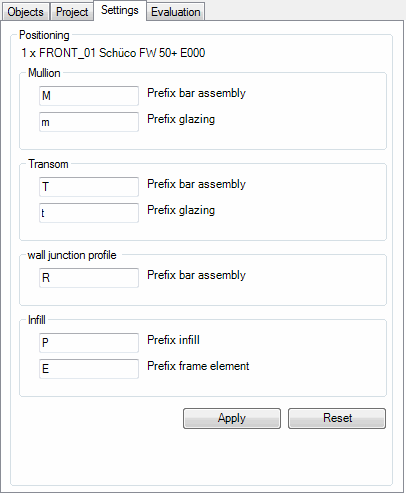
Tab Settings
db_ath_elevation_einstellungen
Dialog box section Positioning
Here, you define the prefixes for the positioning of the various constituent parts of the frame elements. With facade elements there is a different dialog presentation than for window and door elements. The prefix is placed in front of the position number for the relevant object.
Apply Takes over the prefixes you have set.
Reset Restores the previously set prefixes (system settings).
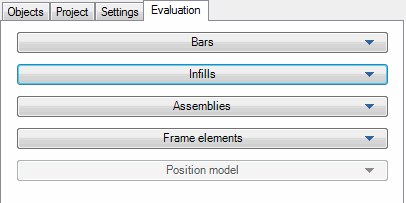
Tab Evaluation
db_ath_elevation_auswertung
Here, you can evaluate the components of the frame elements. The evaluation methods are found in the drop-down menus:
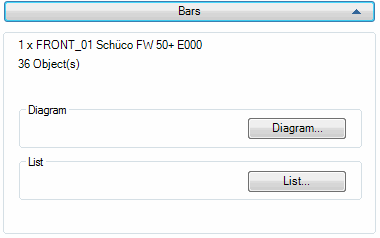
The name and the designation of the active frame element and the number of profile bars are shown for information.
Diagram Produces diagrams (production drawings) of the profile bars. To do this, the Dialog box Bar diagram (job-related) is displayed. You will find further information on this in the section Bar diagram.
List Produces lists of the profile bars. To do this, the Dialog box Bar list is displayed. You will find further information on this in the section Bar list.
Drop-down menu Infills
db_ath_elevation_auswertung_fuellungen
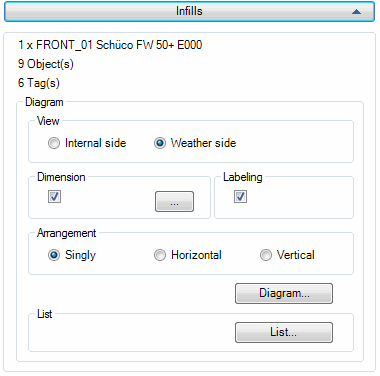
The name and the designation of the active frame element and the number of profile bars are shown for information.
Dialog box section Diagram
Inside view Creates diagrams as views from inside.
Weather side view Creates diagrams as views from outside.
Dimensions Dimensions the diagram of the infill.
[...] Configures the dimension settings for the diagram of the infills. To do this, the Dialog box Dimension options is displayed. You will find further information on this in the section Dimensioning options.
Labeling Labels the diagram of the infill.
Arrangement Singly Has the effect of inserting the infill diagrams in the drawing singly or of creating the separate production drawings. The Dialog box Infill diagram (job-related) is shown on clicking the Diagram button. You will find further information on this in the section Infill diagram.
Arrangement Horizontal Has the effect of arranging the infill diagrams adjacently from left to right in the drawing, when you click the diagram button. An input request follows.
Arrangement Vertical Has the effect of arranging the infill diagrams one below the other from top to bottom in the drawing when you click the diagram button. An input request follows.
Diagram Produces the diagrams (production drawings) of the infills with the settings made. The following appears for horizontal or vertical arrangement:
Input request
Specify insertion point or [?]:
The first diagram is attached to the cross-hairs at the lower left corner. Use the mouse or enter co-ordinates to specify the insertion point for the horizontally or vertically arranged diagrams.
With the option ? you call the help.
Dialog box section List
List Produces a list of the infills To do this, the Dialog box Infill list is displayed. You will find further information on this in the section Infill list.
Drop-down menu Bar assemblies
db_ath_elevation_auswertung_baugruppen
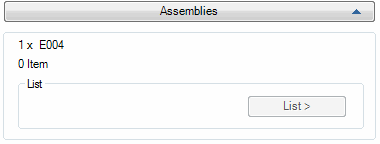
List Generates a list of assemblies if they already exist. To do this, the Dialog box List assembly is displayed. You will find further information on this in the section Assembly list.
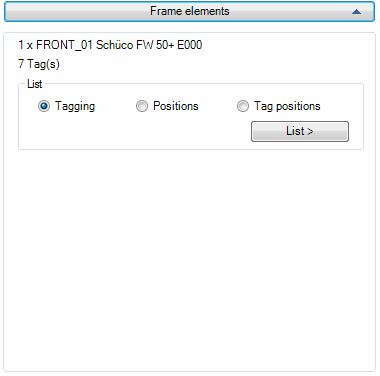
Drop-down menu Frame elements
db_ath_elevation_auswertung_einsatzelemente
The name and the designation of the active frame element and the number of identical parts (tags) are shown for information.
Position model > Generates a position model of a facade element (the button is deactivated for window or door elements). For this, the Dialog box Position model (without project selection) is shown. You will find further information on this in the section Position model.
End of program
The dialog box is terminated with Close. If further actions are required, the command must be repeated.